This is the tutorial I talked about posting in this thread over in gaming:
http://www.tfproject.org/tfp/showthread.php?t=119032
My logic for putting this here is, that thread was devoted to Nerf Games, this one is all about making a Nerf Gun a formidable weapon

I whipped up my first good Nerf gun modification last night, and took pretty good pictures in case it turned out cool enough to do a write-up on. Luckily for my potentially wasted evening, it turned out AWESOME! This gun is a BEAST, easily shooting two or three times harder, faster and farther than when it was new and stock.
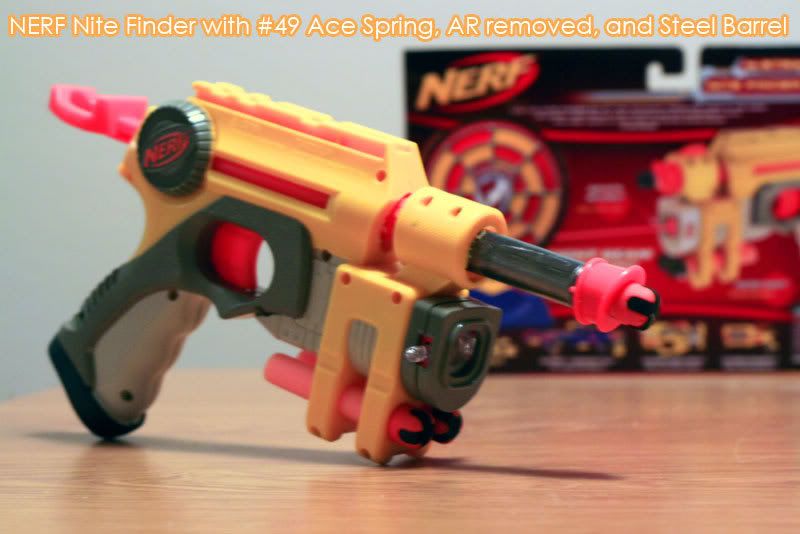
Here's what you need to make one of these high velocity foam delivery devices of your own:
Supplies:
From WalMart or Target or ToysRUs, etc:

1 NiteFinder...it's like $6. While you're there, buy a pack of velcro tagger darts, they fly better than the shitty suction cup ones that come with it.
From Ace Hardware:
#49 Spring...they have a big section of numbered drawers. Should be like a buck fifty.
One 20 or 25mm long M3 screw
One M3 washer
One M3 nut
A 3 to 4" length of SOMETHING that the foam part of your dart fits tightly in (just the foam, not the 'head'...it should be pretty snug. The two things I found that worked were 1/2" CPVC (Yes, CPVC, NOT PVC) and some little steel pipe fitting. The tutorial I did is with the steel fitting. Bring the dart with you and test fit it for yourself.
From wherever:
One sacrificial Nerf dart or equivalent to be cut up and used as internal support. Use one of the ones that comes with it, or something similar that you have lying around.
If you want the 'laser' sight to work, get 2AA batteries.
Tools
M3 drill bit (or 1/8", if you don't have metric) and drill
High temp glue gun (or you can try a regular glue gun if you've already got one, i bought the hi temp cuz the glue is stronger when it's dried) and some high temp glue sticks.
A way to Cut Stuff. I used both a hacksaw and a dremel, but you could probably do this if you just had one of them, or even a decent file.
Some decently rough sandpaper
A phillips screwdriver
This project is really four complimentary modifications.
This mod is really four complimentary mods:
1. Dissassembly and air restrictor removal
2. Spring replacement and plunger reinforcement
3. Barrel replacement
4. Frame clearancing and padding and final assembly
For ease of organization, I'll devote a post to each. You can get the general idea just by scanning through the pictures, but I recommend reading the whole thing before attempting to duplicate it.
Part 1. Disassembly and air restrictor removal
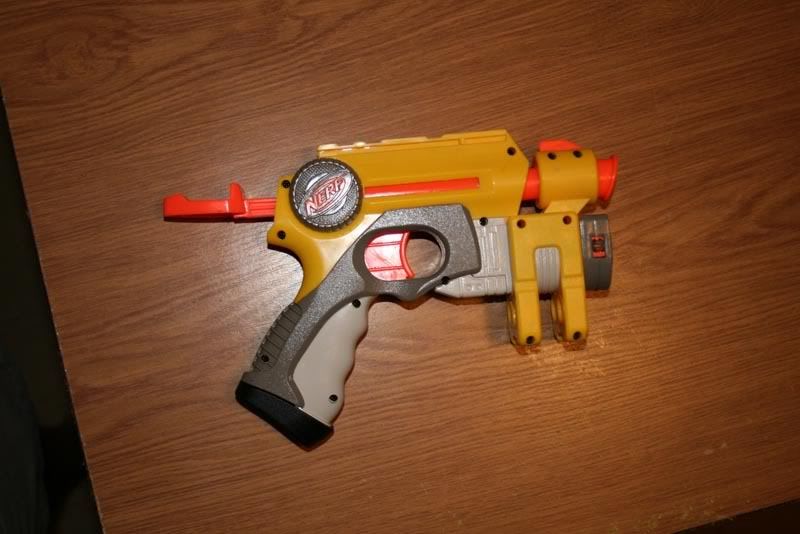
Remove all of the screws on the side. Set these asside...it's not terrible important to keep them straight, they're all basically the same, except for the two longer ones on the bottom right.
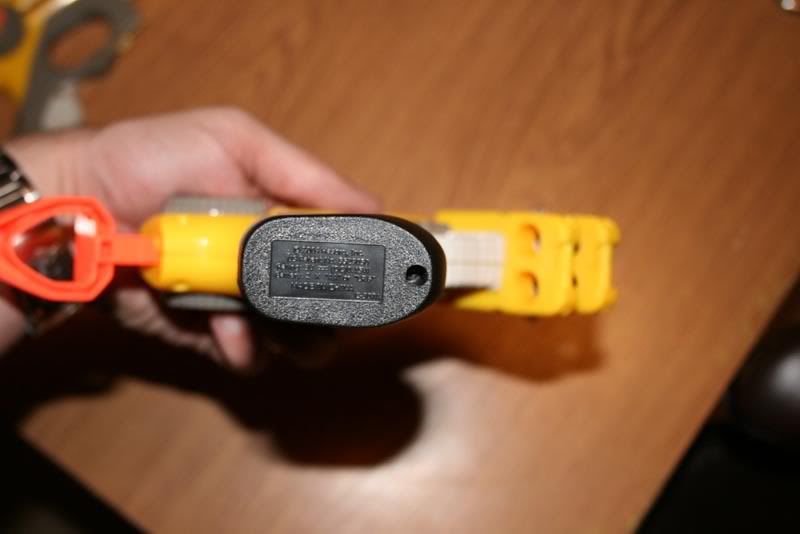
Remove the bottom battery-compartment access screw. Be careful when you seperate the gun, a small square nut will fall out and try to get lost (I didn't notice it was until final assembly, and luckily found it)
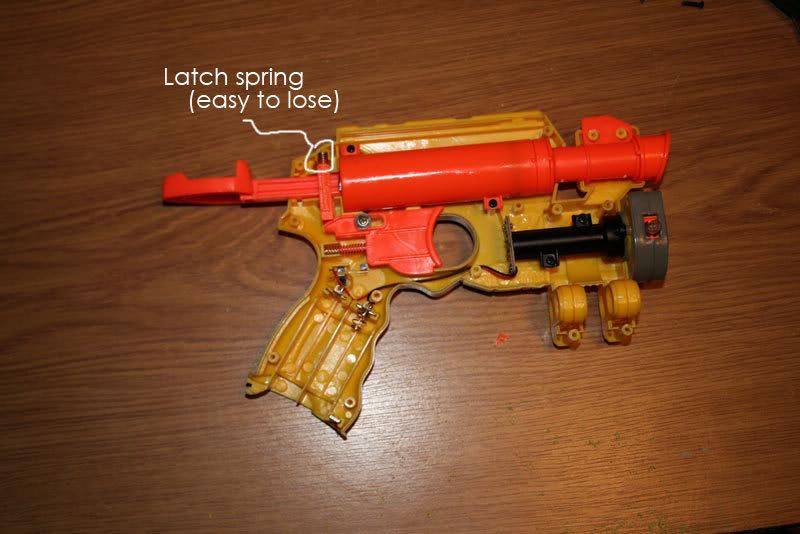
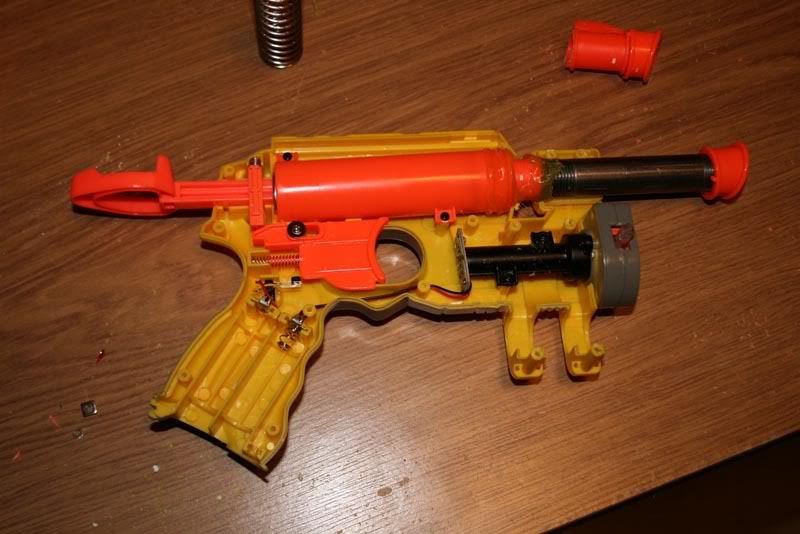
Here you can see the gun open. If you'd like to remove the 'laser' just hack all the electronic bits out of it at this point...for this mod, I just left them in, they're kind of fun, and work better than I thought it would. Go ahead and take the two black screws out of the barrel assembly to remove it...be careful not to lose the vertical latch spring.
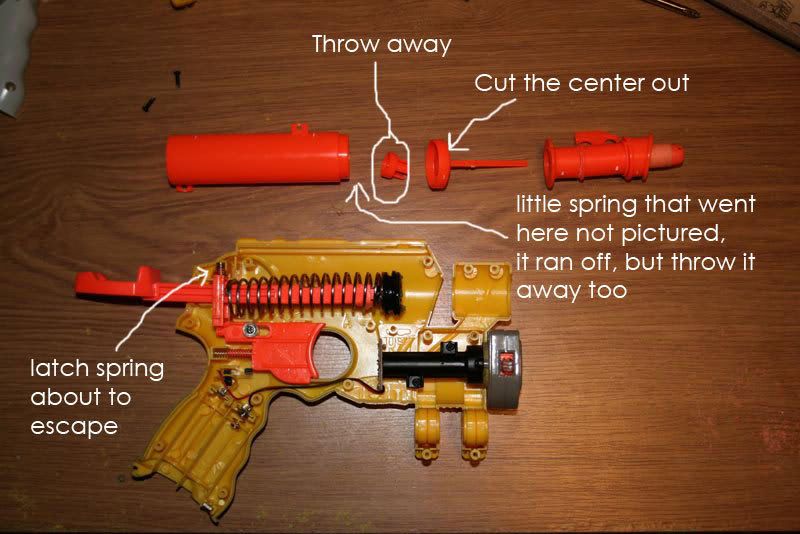
Here you can see that the barrel and cylinder assembly are really five or six parts just squished together...not good at all for an airtight seal. Throw away the three-prong air restrictor and the wimpy spring behind it, and cut the center out of the restrictor part with a long single prong.
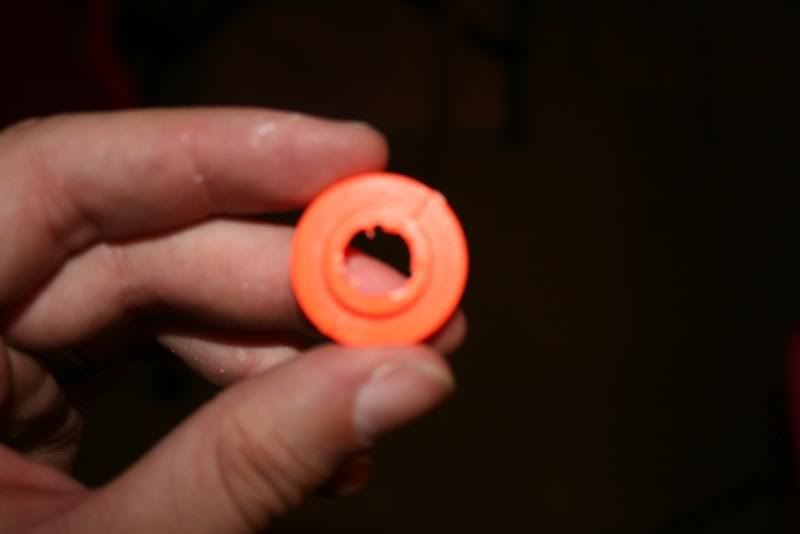
The restrictor should look like this when you are done...I used a drill and a razor blade and needlenose pliers...dremel would have been easier, don't know what I was thinking.
You can stop now, and put it all back together if you want...I haven't shooting with just this, but it is reported online that you get some power gains from this removal. If you couldn't make it to ace to get the spring or barrel, try just sealing all the parts together with hot glue or superglue to make it airtight and putting it all back in. You'll definitely have a better gun than when you started, and until now, all the mods have been free!
Part 2: Spring replacement and plunger reinforcement
Taking care not to lose the latch spring (put it somewhere safe--i lost mine sometime after this picture was taken, as you can see it perched precariously), remove the spring and plunger assembly. Try to leave as much lubricant on it as you can. Take the phillips head screw out of the plunger head, but be careful to keep the plunger head together...it's actually two pieces and an o-ring.
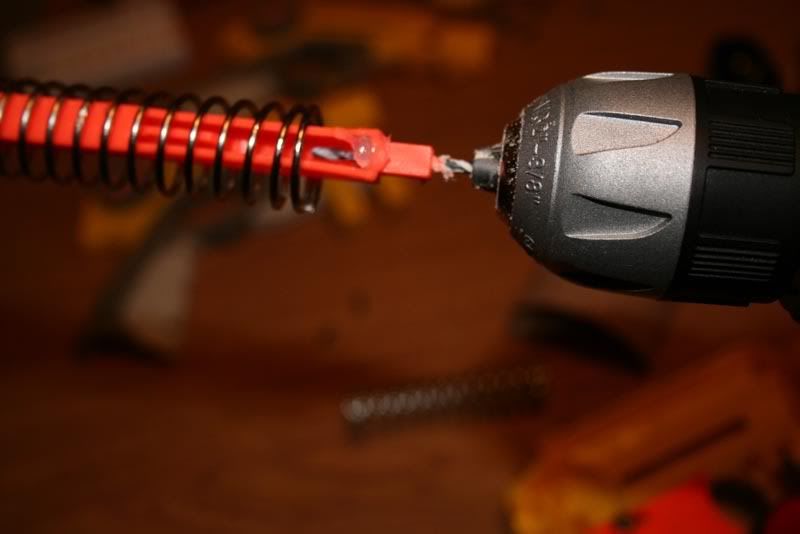
With your 3mm drill bit (or 1/8", whichever), enlarge the hole in the end of the plunger rod, as well as in the plunger head (forgot to take a picture of that, you guys are clever enough to figure it out)
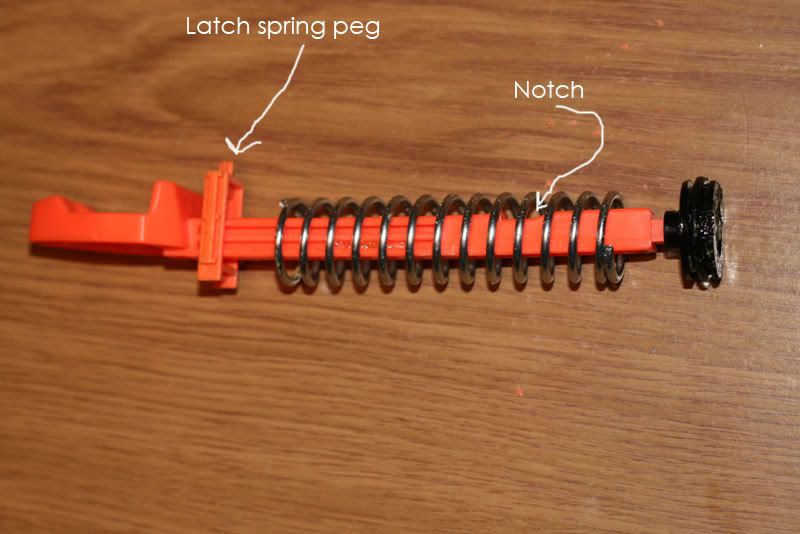
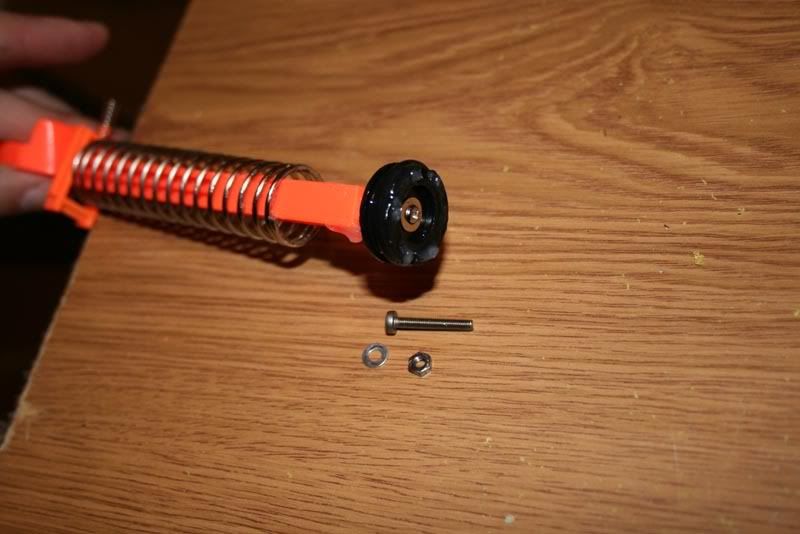
Once you've drilled the plunger shaft and head, reassemble the plunger assembly. Be sure you get the orientation of the latch spring peg and the notch in the shaft correct, and don't forget to swap in your new Ace Hardware #49 spring!
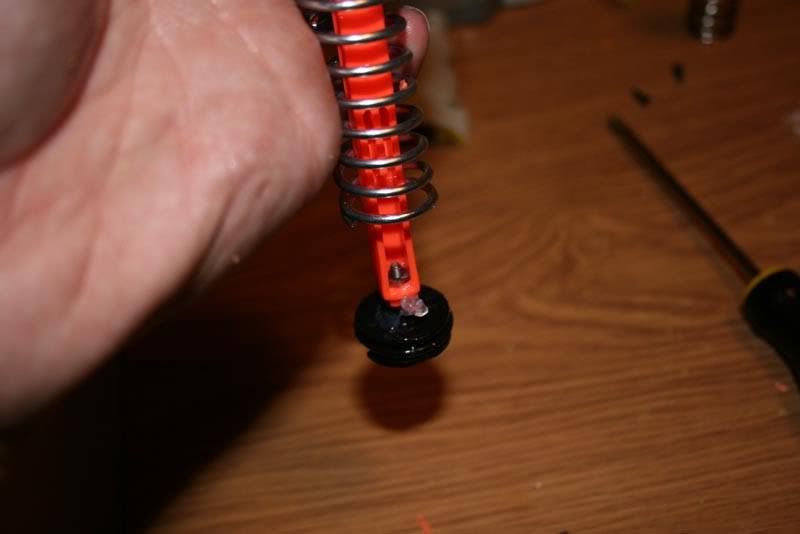
The 3mm nut is just the right size to fit in the groove, and let you thread the screw through the plunger head and shaft and into it. I recommend putting a washer under the screw head (before the plunger head), because, if you picture the forces at work when the gun is cocked, all of the force goes from the spring to the plunger head to the attachment screw--the whole reason we're replacing this screw to begin with! It can take a couple tries, or some tiny needle nose pliers, to get the nut lined up and threading correctly, so just be patient.
Part 3: Barrel Replacement
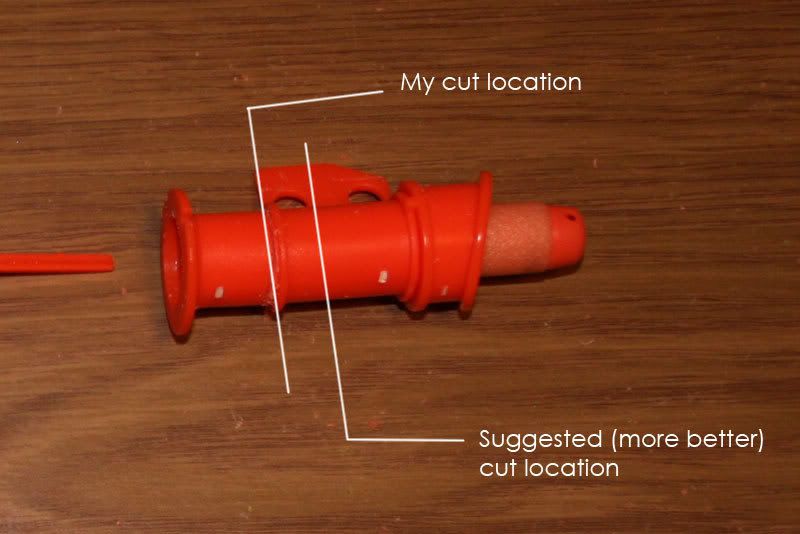
I didn't really think out my cut location, in fact I was pretty sure I was going to have to head back to the store and buy a coupler to get teh barrel to fit correctly and securely. However, it fit fine with just hotglue. Because of the cut location I picked, the extra width the hot glue added meant I had to clearance the body of the gun to get it back together...TEHREFORE I recommend cutting where I marked 'suggested cut'
tl;dnr version: Make a cut where it says suggested.
It is very important that this cut be as close to square as you can make it. Mine wasn't and my gun suffers from some crookedness because of it.
Now, depending on your barrel material, your prep work here will vary. If you have plastic of some kind, cut it to length...make it a little bit longer than the foam body of one of the darts. If you have steel, like I did, check and see if it is rough inside...mine had some slag left from the casting, so I rolled up some sandpaper and smoothed it out.
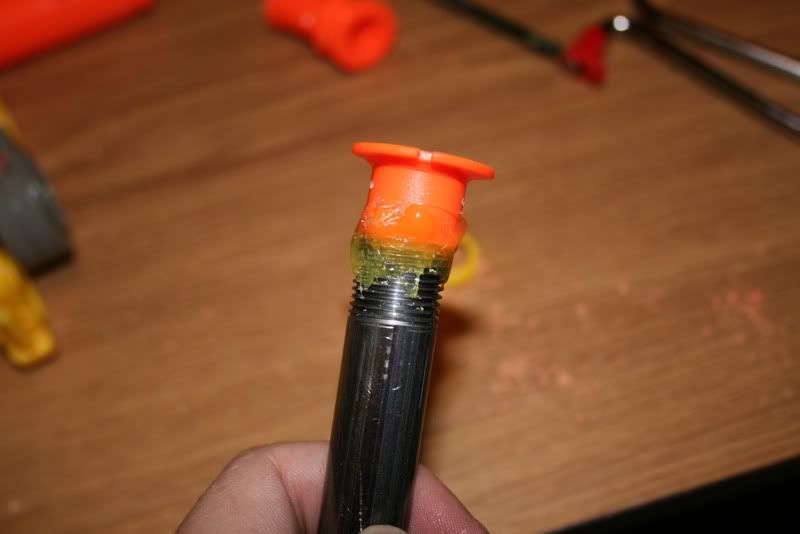
Once you are happy with your barrel, carefully hotglue your new barrel to the stub of the old one. This is why it is important you got it straight (I clearly did not). For better adhesion, rough up all plastic surfaces with some rough sandpaper before attempting to glue. You need to make this an airtight joint, so once you've got them stuck together, run a bead all the way around.
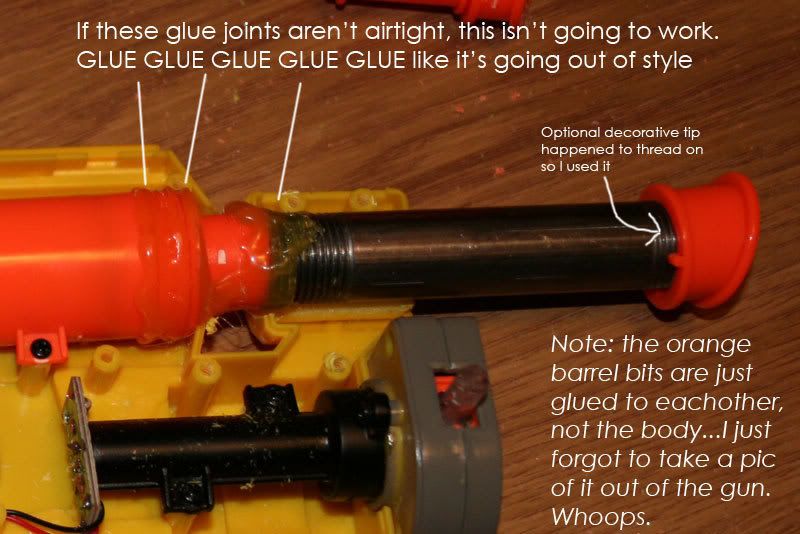 Note: don't actually install anything in the gun yet, this is just the only picture i had showing my glue joints. Something about hi temp hot glue and trying not to burn myself made me forget to take a picture at the time
Now you need to glue together all the parts of the barrel assembly that you took apart. This means glueing the barrel stub back to the drilled out restrictor, and glueing the restrictor to the cylinder. All of these need to be airtight joints, so once everything is glued, block the end of the barrel with the palm of your hand and carefully fill the whole assembly with water. If any leaks out, seal the leaks with more hot glue. More is better than less here, as we can compensate for pretty much any extra bulk. Doesn't have to be pretty, just make sure it is sealed!
Step 4: Frame clearancing, padding, and final assembly
This step is pretty free-form, all the hard parts are over. You can sum up this whole step in "cram everything back into the body" but, in case you're curious how I did it, here's more detail:
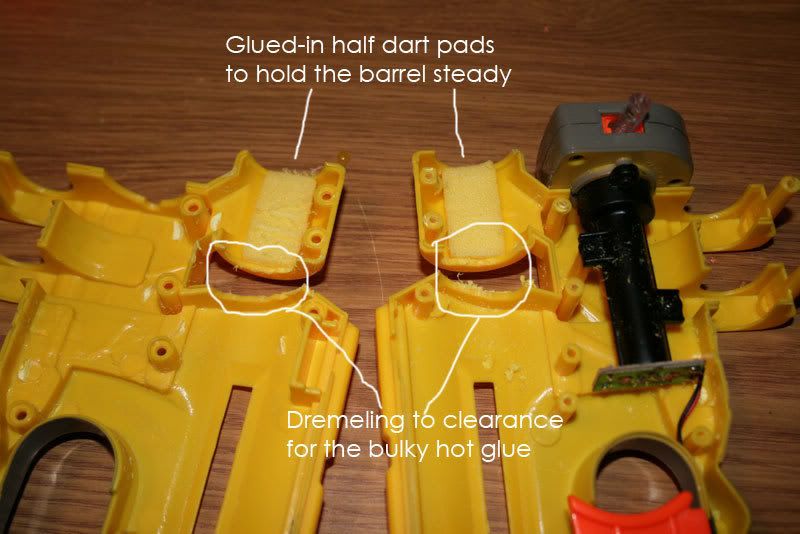
I took the life of a sacrificial arrow dart from a dollar store nerf knockoff (it had fins and wasn't the right diameter to use for nerf, so I didn't feel bad mangling it) for this step. I think a nerf dart would work fine for this step, too, if not, I'm sure you'll be able to adapt something. Test fit a bunch to see how much you have to dremel--if you cut the barrel stub where I recommended, you'll only have to dremel the farther back flange, not the one closer to the barrel tip, as the glue glob will be completely inside of the little forward enclosure. In any case, slit a dart in half (or something) and add padding to support the barrel from side to side shaking and other abuse. You could just wait until the gun is fully assembled and glob hot glue in around the barrel until it doesn't move, but I still wanted to be able to take my gun apart.
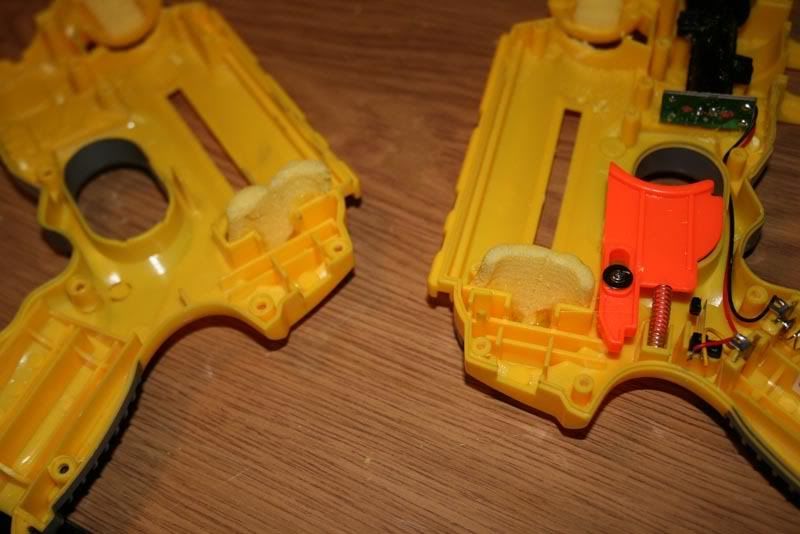
Now, slit what is left of the dart lengthwise, and cut that piece in half...you'll understand what I mean if you try to do it. Those pieces are perfect for padding the rear spring perch. I'm not totally sure this is neccessary, but it surely can't hurt anything.
I used my gluegun tip to burn the foam even with the sides of the perch, so it wouldn't interfere with the plunger shaft or the opposite side of the case. If you think this is a good idea, go for it, otherwise, feel free to skip this whole step.
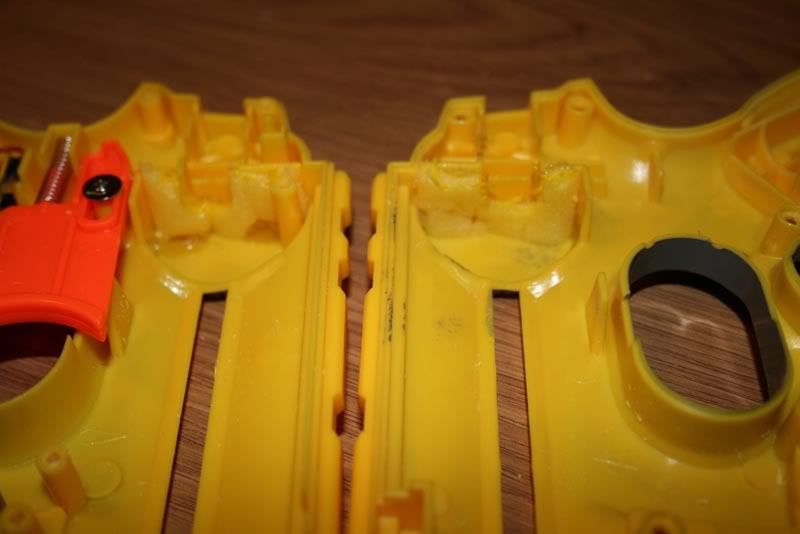
Slide the plunger assembly into the cylinder, and carefully line everything up with the body, starting with the latching mechanism and the latch spring, as you reassemble teh gun. Reassemble it into this side first, so you can throw the two retaining screws in. The flange for the lower of the two retaining screws is almost surely going to get sheared off, but because the barrel is clamped between pieces of foam, I don't feel like I need to reinforce it. Maybe a project for later.
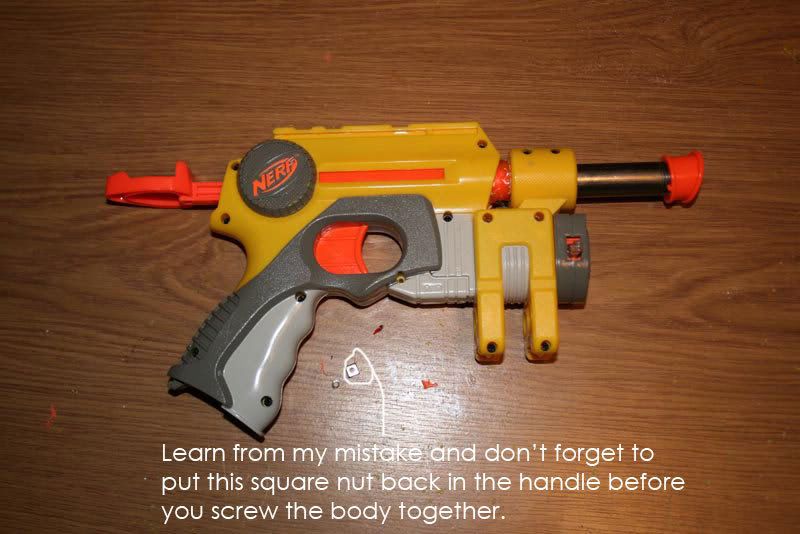
Make sure the trigger is lined up in its track. Be sure you put the little square nut for the battery cover back in its little groove before putting the two body halves together, or you'll hate yourself when you go to put the battery cover on. Once that's in, snap teh body halves together, screw it together (longest two screws go under the dart holders, rest don't seem to matter), throw in some batteries if you're using the light, and you're done! Congratulations! You now have a nerf gun capable of shooting 60+ feet with startling velocity and surprising accuracy. Load a dart, cock it (see how much harder now?) and fire it off at whatever looks like a target. Maniacal laughter is appropriate at this point.
THE END